
Common Symptoms
- Strap stops in the track or arch.
- Poor or inconsistent forward feeding.
- Twisting, wandering or misalignment of the leading end.
- Failed retraction or a misplaced overlap.
- Inconsistent welding or cutting at the head.
- Poor tensioning despite apparently normal feed.
- Intermittent jams at restarts or as a coil empties.
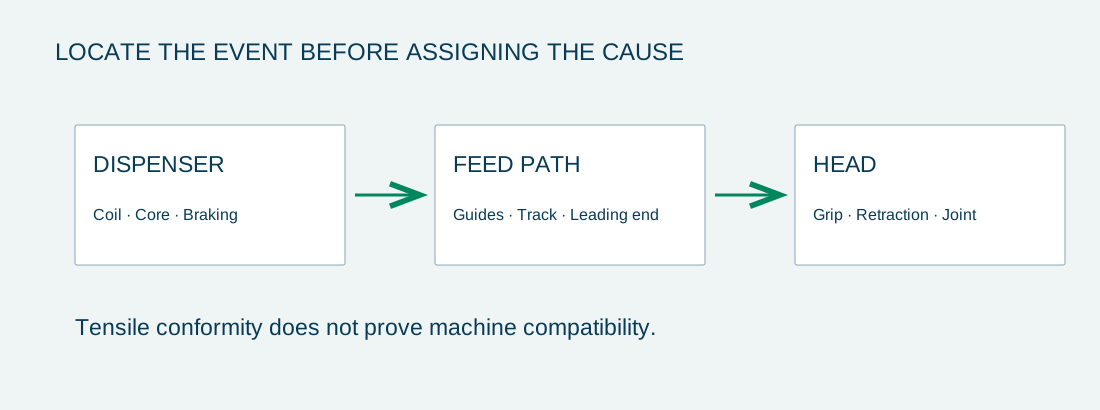
Note whether the event starts at the dispenser, accumulator, arch entry, corner, retraction stage or head. A joint problem is not necessarily a feeding jam; record the sequence before assigning a cause.
Most Likely Causes
| Potential contributor | What to check |
|---|---|
| Width / thickness | Actual values and variation, including the agreed embossed-caliper method. |
| Lateral camber | Sideways curvature under a defined measurement method. |
| Curl | Out-of-plane curvature and leading-end behavior. |
| Twist | Rotation along the strap and its entry into guides. |
| Stiffness | Interaction with the actual path and bends; no universal target is assumed. |
| Surface friction | Texture, contamination, gripping and track contact. |
| Coil build | Loose wraps, telescoping, layer crossing or changing unwind resistance. |
| Dispenser braking | Approved setup, coil inertia, drag and supply consistency. |
| Track contamination | Dirt, fragments, damage, worn guides or obstructions. |
| Machine settings | Material/dimension selection, feed/retract behavior, tension and joining settings. |
These are possible contributors, not a diagnosis. Several can occur together; change one controlled variable at a time where practical.
Diagnostic Sequence
- Step 1: Confirm machine-approved strap window. Identify exact model/head, PET approval and permitted dimensions/settings. Use the equipment instructions.
- Step 2: Measure actual strap. Check width, thickness, method and variation against the requirement; retain label and lot identity.
- Step 3: Check camber/curl/twist. Record shape, sample condition and the stopped leading end rather than relying on a hand-straightened specimen.
- Step 4: Inspect coil build. Record loose layers, deformation and whether the event changes across the coil.
- Step 5: Check dispenser. Verify fit, unwind direction and authorized braking/setup against the manual.
- Step 6: Inspect track. Qualified personnel should use the specified safe isolation and maintenance procedure before accessing guides or obstructions.
- Step 7: Check welding/tension settings. Separate feed, grip, retract and joint symptoms. Adjust only within approved instructions; do not bypass guards or interlocks.
- Step 8: Compare multiple coils/lots. Use a known approved baseline under equivalent conditions, record cycles and failures, and retain evidence.
Problem → Cause → Fix
| Observed problem | Possible cause to investigate | Controlled next action |
|---|---|---|
| Leading end stops at arch entry | Dimension mismatch, curl, damaged entry or alignment. | Measure the strap and inspect the identified path; compare with an approved baseline. |
| Strap twists before the head | Twist, guide interaction or incorrect dispenser orientation. | Record the event and check coil direction and guide setup against instructions. |
| Jams begin after a coil change | Core/coil mismatch, braking or loose/crossed layers. | Compare supply format and dispenser setup; retain the affected coil identity. |
| Feed varies as the coil empties | Changing resistance, layer build or dispenser behavior. | Observe beginning/middle/end conditions and check the dispenser within its approved setup. |
| Retraction fails after normal forward feed | Grip, alignment, track or control issue. | Separate retraction from initial feed; have authorized personnel inspect the relevant mechanism. |
| Joint opens although feed is normal | Overlap, surface, contamination, welding/cooling or wear. | Classify the joint failure and test the approved strap/settings combination. |
| Tension is inconsistent | Slipping gripper, wrong material window, settings or package movement. | Review actual dimensions and grip condition; compare applied and retained tension. |
| Both approved and suspect coils jam at one location | Track damage, contamination, sensor or alignment issue. | Use manufacturer-authorized inspection and maintenance before concluding a material defect. |
The actions are diagnostic directions, not universal machine repair instructions. Stop using affected packaging where its restraint is uncertain and follow the responsible site procedure.
When the PET Strap Is Not the Root Cause
A dirty track, worn guide, dispenser fault, incorrect setting, tool-maintenance problem or sensor/alignment issue can create similar symptoms. An in-window strap can still fail on an installation that is out of adjustment. Conversely, a poorly maintained machine does not prove that every suspect coil conforms.
Use controlled comparisons: the current approved strap versus the candidate on the same machine, or the same coil on a verified compatible setup where appropriate. Record what changes and keep other conditions stable. Involve the equipment provider for maintenance or adjustments beyond the operator’s authority.
Why One Successful Coil Does Not Prove Compatibility
One successful coil demonstrates only the conditions covered by that run. Lot variation, layer build, restarts, speed range, package dimensions and environmental conditions may not all have been tested. A short sample can also miss a coil-position problem.
Define a trial duration and coil/lot coverage that reflect application risk and purchasing requirements. Track failures relative to total cycles, identify jam locations and retain made-joint observations. There is no universal successful-cycle count or fixed number of coils that automatically approves every line.
How to Validate Machine-Grade PET Strapping
- Use the actual machine, relevant head/configuration and representative loads.
- Record the proposed grade, lot, dimensions, surface and coil/core.
- Run agreed settings within the equipment’s approved operating window.
- Cover multiple coils or lots and operating conditions as the agreed plan requires.
- Measure feeding, retraction, applied tension, made joints and cutting.
- Record stoppages, downtime, restarts and any package damage or movement.
- Compare against acceptance criteria and document approval before routine production.
FAQs
Why does PET strap jam?
PET strap can jam because of dimensional mismatch, camber, curl, twist, stiffness, surface interaction, coil build or dispenser behavior. Machine contamination, worn guides, alignment or settings can produce similar events. Identify the failure location and compare actual strap and equipment conditions against the approved window. A tensile pass alone does not identify or eliminate these feeding causes.
Can 15.5 mm and 16 mm PET strap be interchangeable?
Do not assume 15.5 mm and 16 mm PET strap are interchangeable. The machine/head may have guides, grippers and joining components with a specific width and thickness window. Check actual dimensions and variation, the exact model documentation and trial results. A shared nominal 5/8 inch purchasing description does not establish identical metric dimensions or equipment approval.
Does higher tensile strength help machine feeding?
Higher tensile strength does not by itself improve machine feeding. A tensile test measures loading behavior, while travel through the equipment depends on geometry, stiffness, surface, the dispenser and the path. A stronger grade may still jam if it is outside the approved dimensional window. Diagnose the observed event before selecting a higher-force strap as the correction.
Can one PET strap work on every automatic machine?
No single PET strap should be assumed to work on every automatic machine. Approved materials, dimensions, track geometry, heads, dispensers and joint processes vary. Qualify the proposed grade on the actual installation and operating conditions. A successful trial on another model, line or package does not transfer automatically to the equipment under review.
Does coil winding affect feeding?
Coil winding can affect feeding through unwind resistance, layer stability, loose wraps, telescoping or crossed layers. Core dimensions, coil mass, direction and dispenser braking also matter. Observe where and when the event occurs, including different positions in the coil. Check the supply format and dispenser against the approved setup rather than judging compatibility only from a short free sample.
Should I increase feed speed or weld time to stop jams?
Do not increase speed or welding time as a universal response to jams. Feed-path obstructions, incorrect dimensions and coil problems require different actions, and excess welding energy may damage a joint. Classify the event, use the manufacturer’s approved adjustment procedure and retain controlled comparison results. Maintenance and internal access should be handled by authorized personnel.
What evidence should a feeding complaint include?
A useful complaint includes machine/head model, settings, current and affected strap specifications, coil/lot labels, failure location, timing and photos or video where safely captured. Record failures against total cycles and note coil position, restarts and maintenance condition. Preserve unused same-coil samples and the stopped leading end if practical, so the review can distinguish material and equipment contributors.
Send the Feeding Problem for Technical Review
Send Newton the machine model, current strap specification and a description of the feeding problem. Include coil/lot identity, where the strap stops and the operating conditions. Request a structured review before changing grade or settings.
Technical Scope and Evidence
This guide describes selection principles and evidence to request. It is not a Newton grade data sheet, package load rating or equipment approval. Confirm the proposed grade, test basis and actual application before ordering.
For the test and measurement framework, see breaking-force and joint evidence and dimensions and process consistency.